BACKGROUND
Suppose you had some results and you were interested in whether or not these findings were sensitive to change. You can illustrate these effects using a tornado diagram, which uses bar charts to compare the change from the original findings. In other words, tornado diagrams are useful to illustrate a sensitivity analysis.
In this tutorial, we will provide you with a step-by-step guide on how to graph a tornado diagram from a sensitivity analysis.
MOTIVATING EXAMPLE
Imagine that you are planning a vacation, and you allocated $6,000 for the trip. You perform some cost estimates and find a vacation package that costs $5,050, which is within your budget. But then you see some deals and some extra luxuries that you want to add to your current vacation package. Some of these will change the cost of your original cost estimates. In order to see which of these additional deals or luxuries would impact your cost estimates, you decide to perform a one-way sensitivity analysis. That is, you change the cost of one variable at a time to see how it effects your original cost estimates (e.g., base-case).
Table 1 summarizes your base-case vacation costs and the possible changes due to the additions of deals and luxuries.

The “Low input” or “deals” reduce the total cost of your vacation. The “High input” or luxuries increase the cost of your vacation.
You want to visualize if any of these adjustments will change your original cost estimates (e.g., $5,050).
BUILDING A TORNADO DIAGRAM
A tornado diagram can be used to visualize these additional changes to the variables.
Step 1: Open Excel and insert a clustered bar chart

Step 2: Enter data for the “Low input”
Right-click on the empty chart area and select “Name” and enter “Low input.” Then in the “Y values:” box, select all the values in the “Low result” column of your table. In the Horizontal (Category) axis labels:” highlight the variable names under the “Base-case results” column. The figure below illustrates the correct selections for each input box.

Step 3: Enter data for the “High input”
Repeat same steps for the “High input” data range.

Step 4: Center the axis at the estimated cost
Right-click on the X-axis and go to the Format Axis > Vertical Axis Crosses > Axis Value and enter “5050.” This will center the axis at the estimated cost of $5,050.

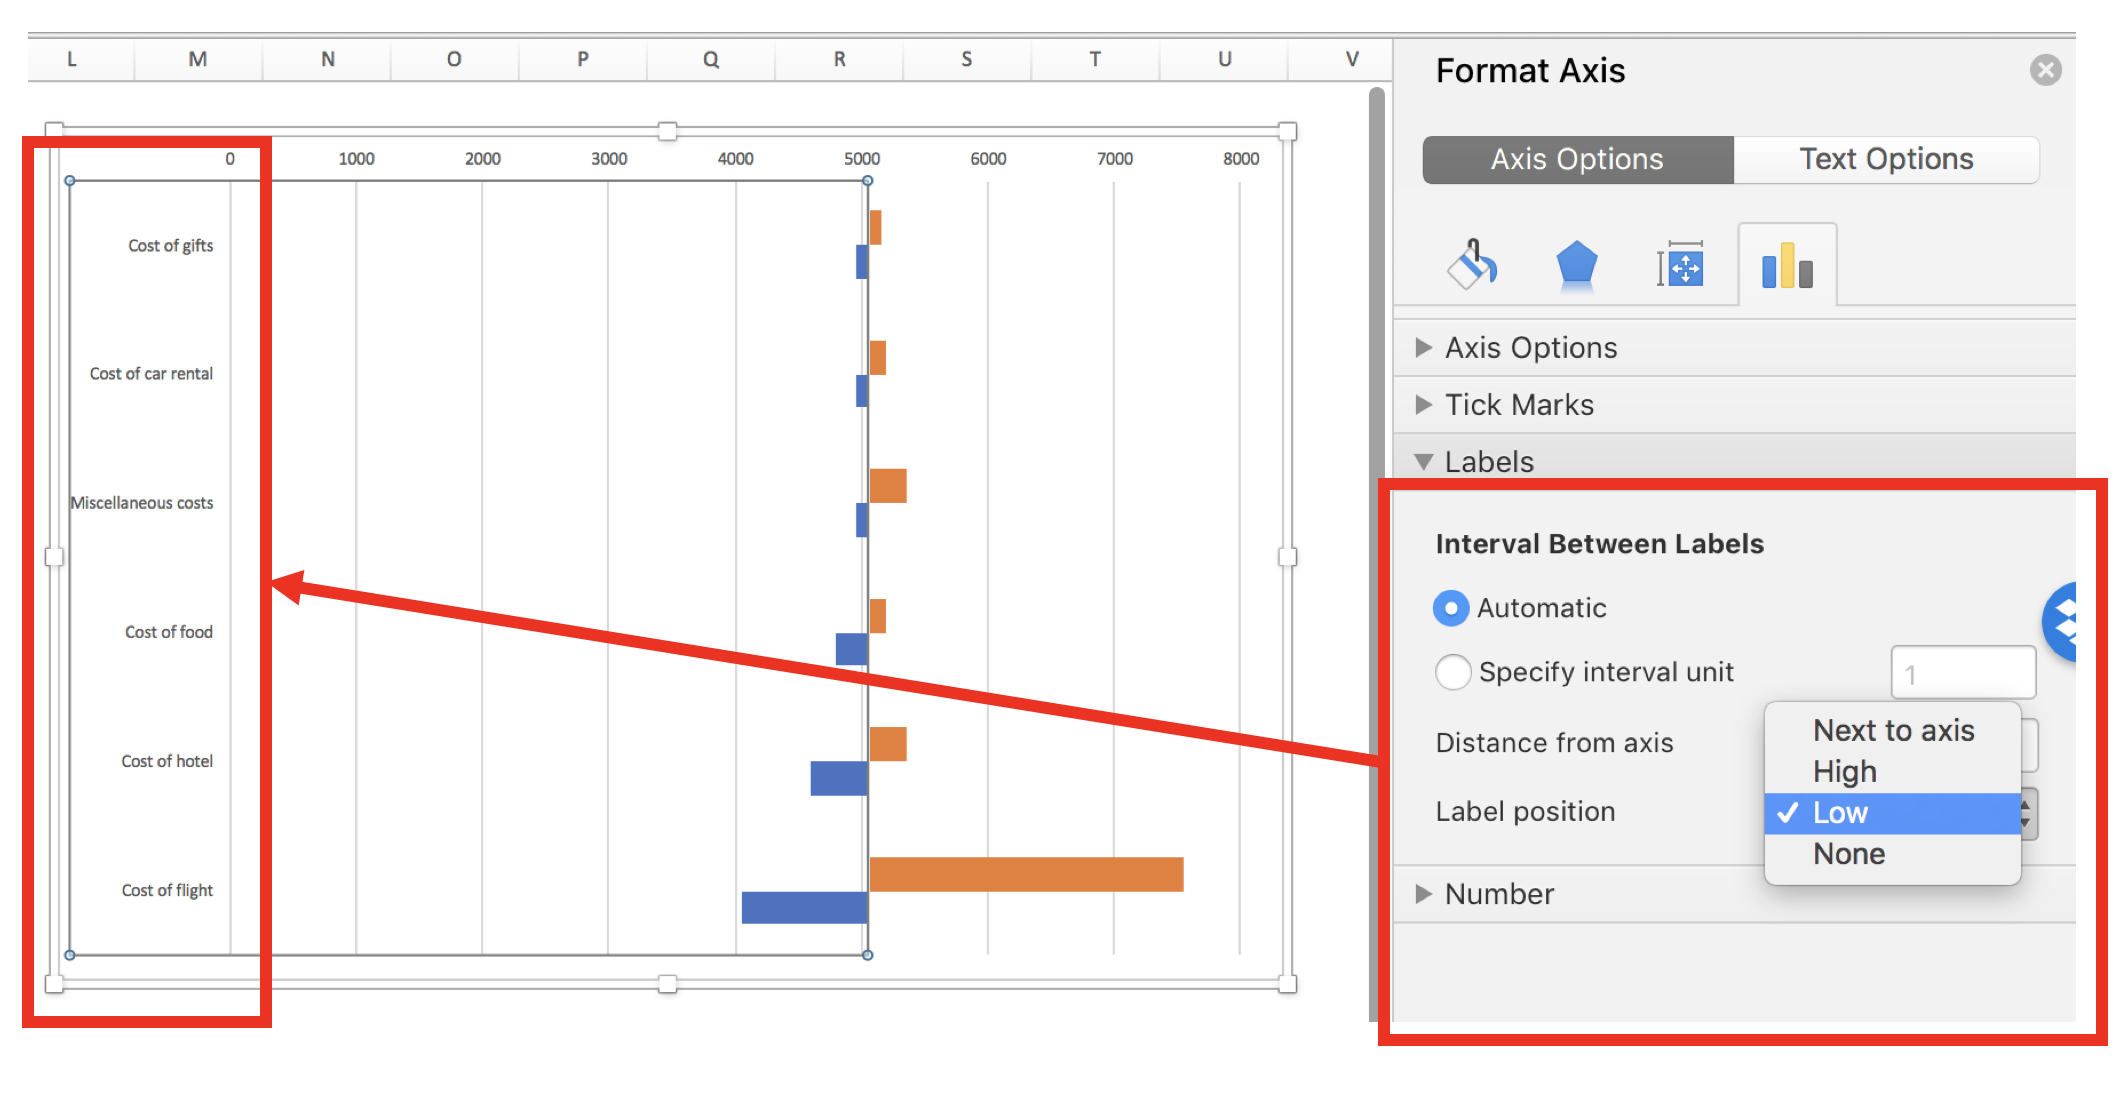
Step 5: Move the variable names to the left side of the plot
After centering the axis on the estimate cost of $5,050, you can start to see the beginnings of a tornado diagram. However, the variable names are in the way. To relocate these, Right-click on the Y-axis and select the Axis Options > Interval Between Labels and select “Low.” This will move the variable names to the left side so that it doesn’t interfere with the bars in the middle of the chart.
Step 6: Align the bars so that they are next to each other
The bars are not aligned with each other. You can align them using the series overlap option. Right-click on one of the bars and go to Series Options > Plot Series On and enter 100 on the “Series Overlap” widget. After you press Enter, the bars should be aligned with each other.

Step 7: Sort and change fonts
To complete the tornado diagram, you can sort the bars so that the largest change is at the top and the smallest change is at the bottom (looks like a tornado). Right-click on the Y-axis and got to Format Axis > Axis Options > Axis Position and check the box “Categories in reverse order.” This will order your diagram to look more like a tornado.

Step 8: Final changes and edits
The last steps improve the aesthetics. Changing the fonts and colors can improve the tornado diagram.

CONCLUSIONS
The tornado diagram tells us that paying for an additional “luxury” for the cost of the flight will exceed our budget of $6,000 (indicated by dotted red line). As a result, we will not spend extra capital to upgrade our seats! However, we can splurge a little when it comes to other elements of our trip (e.g., expensive meals, luxury vehicle rental, or additional excursions).
REFERENCES
I used the following guide developed by Excel Champs to develop this this blog.
Note: Updated on 11 July 2022